Perfectly Fluffy Mini Muffins: 7 Easy Recipes You’ll Want to Bake Again
There’s something undeniably fun about mini muffins. They’re soft, poppable, and just the right size to satisfy a sweet tooth without going overboard. Whether you’re meal prepping for the week, packing school lunches, or baking up a quick weekend snack, these little treats always hit the spot.
Mini muffins aren’t just shrunken versions of your favorite baked goods. They cook faster, store easily, and let you experiment with flavors in smaller batches. From rich chocolate chip mini muffins to wholesome oat-based varieties, they’re as versatile as they are tasty.
In this guide, you’ll learn everything you need to make perfect mini muffins every time. We’ll cover baking times, storage tips, flavor variations, and even how to recreate that nostalgic Little Bites muffins recipe at home.
Grab your mini muffin pan and let’s get baking.
Table of Contents
What Are They, Really?
They’re exactly what the name suggests: smaller, bite-sized versions of traditional baked goods. Though mini in size, they deliver all the flavor and fluff of their full-sized counterparts.
What makes them special is how convenient they are. Easy to grab, easy to share, and great for everything from lunchboxes to party trays. Because of their small shape and quick cooking time, you can prepare a full batch in much less time than regular ones.
The ingredients are simple and familiar: flour, sugar, eggs, and some kind of fat like butter or oil. The fun part is customizing the flavor combinations. You can fold in chocolate, berries, banana, oats, or a hint of warm spice like cinnamon to suit your mood or the season.
Wondering about bake time? Typically, they’re ready in just 10 to 15 minutes at 350°F. Quick, efficient, and great for beginner bakers or anyone short on time.
They’re flexible, beginner-friendly, and a smart way to enjoy sweet or savory baked goods in smaller portions that feel satisfying without overindulging.
Essential Ingredients for Perfect Texture
The secret to fluffy and flavorful mini muffins starts with the right ingredients. While most mini muffin recipes share a common base, it’s how you balance and mix those ingredients that affects the final texture.
Flour
All-purpose flour is the go-to, but if you’re aiming for a healthier batch, try substituting part of it with oat flour or whole wheat flour. Oat flour adds a light, nutty flavor that pairs perfectly with banana or blueberry muffins.
Leavening Agents
For that perfect rise, you’ll need baking powder or baking soda. The amount depends on the batter’s acidity and moisture level. A well-leavened batter gives your mini muffins that signature dome shape.
Fat
Butter gives richness and depth, while oil (like canola or vegetable) makes the muffins extra moist. Some bakers even combine the two for the best of both worlds.
Sugar and Sweeteners
Granulated sugar works great in basic recipes. But brown sugar adds moisture and depth, and maple syrup or honey can make your muffins more wholesome — especially in oat-based versions.
Eggs
Eggs help bind everything together. For egg-free options, try mashed banana or applesauce as a natural substitute. They also boost moisture and flavor.
Add-Ins
This is where the magic happens. Whether you’re going for chocolate chip mini muffins, banana oat, or cinnamon swirl, your mix-ins bring personality. Just remember not to overload the batter.
Mini muffins depend on balance. Too much flour and they get dense. Too little fat and they’ll dry out. Stick with tested measurements, and you’ll get fluffy bites every time.
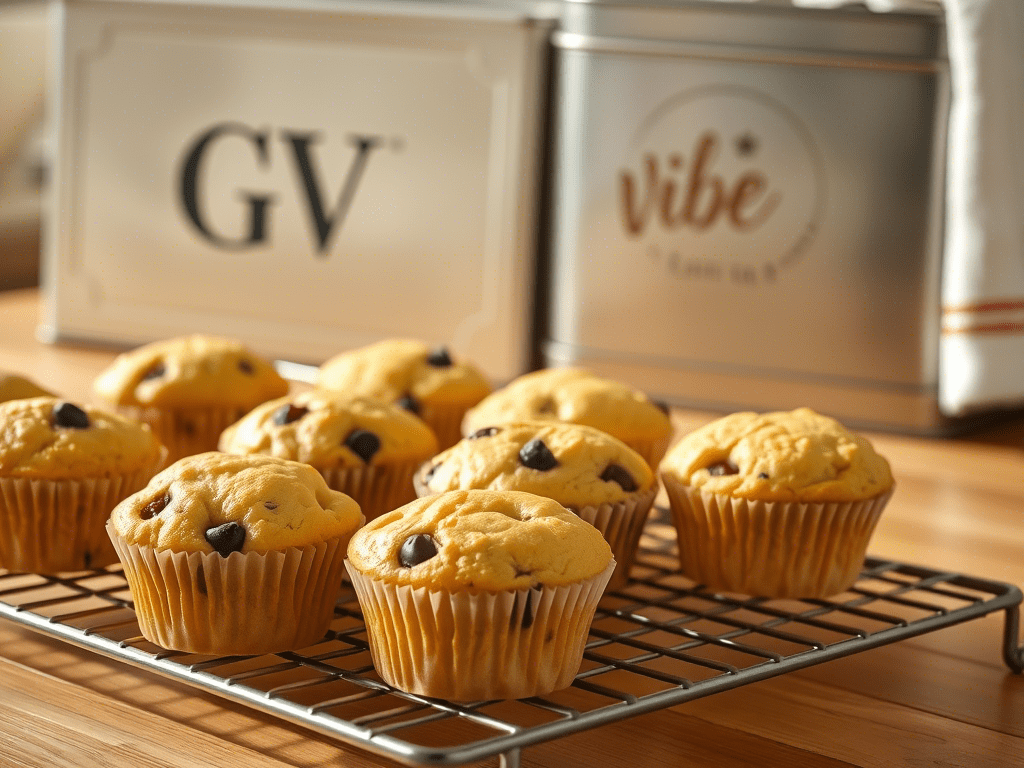
Chocolate Chip Mini Muffins (Go-To Recipe)
If there’s one version of mini muffins that everyone can agree on, it’s chocolate chip. Sweet, moist, and just the right size to snack on without guilt. This recipe is a must-have in your rotation, especially if you’re baking for kids, parties, or meal prep.

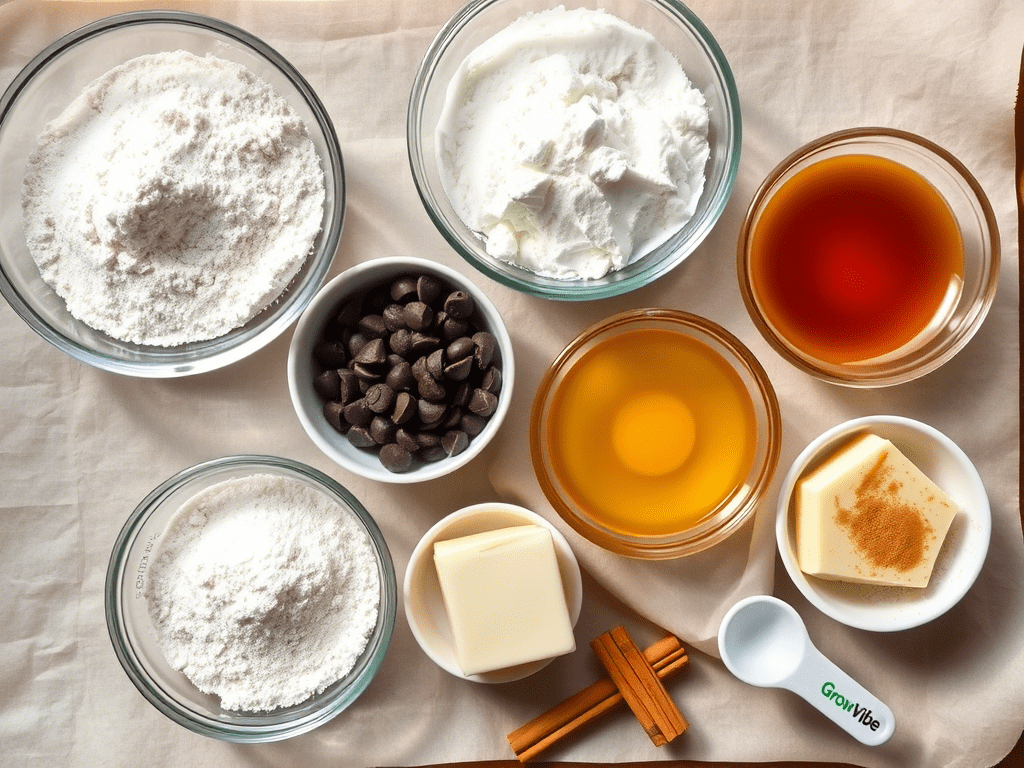
Ingredients
- 1 and ½ cups all-purpose flour
- ½ cup granulated sugar
- ¼ cup brown sugar
- 1 teaspoon baking powder
- ¼ teaspoon baking soda
- ½ teaspoon salt
- 1 egg
- ½ cup milk (dairy or almond)
- ¼ cup melted butter
- ¼ cup vegetable oil
- 1 teaspoon vanilla extract
- ¾ cup mini chocolate chips
Instructions
- Preheat oven to 350°F and grease a mini muffin pan or line it with paper liners.
- In a large bowl, whisk together flour, baking powder, baking soda, and salt.
- In a separate bowl, combine egg, sugars, melted butter, oil, vanilla, and milk.
- Pour wet ingredients into dry and gently fold until just combined. Don’t overmix.
- Fold in chocolate chips.
- Fill mini muffin cups about ¾ full.
- Bake for 10 to 12 minutes until tops are golden and a toothpick comes out clean.
- Cool for 5 minutes in the pan, then transfer to a wire rack.
Pro Tips
- For extra flavor, sprinkle a few chocolate chips on top before baking.
- Store in an airtight container at room temperature for 3 days or freeze for up to 2 months.
This recipe is a true crowd-pleaser and sets the base for endless mini muffin recipe variations. Add banana, swap chips for berries, or toss in oats for more texture.
Little Bites Muffins Recipe (Copycat Style)
Ever crave those soft, sweet Little Bites muffins from the store? You’re not alone. The good news is you can make a homemade version that tastes even better. Plus, you’ll know exactly what’s going into every bite.
This recipe recreates that ultra-moist and fluffy texture using simple ingredients and a quick prep process. It’s ideal for anyone who grew up snacking on these treats or wants a homemade version for school lunches and grab-and-go snacks.
Ingredients
- 1 cup all-purpose flour
- ½ cup oat flour or blended oats
- ½ teaspoon baking powder
- ¼ teaspoon baking soda
- ¼ teaspoon salt
- 2 tablespoons unsalted butter, softened
- 2 tablespoons oil
- ⅓ cup sugar
- 2 tablespoons applesauce or 1 mashed banana
- 1 egg
- ½ teaspoon vanilla extract
- ¼ cup milk
- ½ cup mini chocolate chips
Instructions
- Preheat oven to 350°F and line a mini muffin pan.
- In a medium bowl, whisk together flours, baking powder, baking soda, and salt.
- In another bowl, mix butter, oil, sugar, and applesauce. Add the egg and vanilla.
- Stir in milk, then combine with dry ingredients until just mixed.
- Fold in chocolate chips gently.
- Fill muffin cups two-thirds full and bake for 10 to 12 minutes.
- Let cool completely before storing.
These mini muffins are soft, sweet, and perfect for freezing or storing in lunchboxes. They’re a great way to recreate a childhood favorite using real ingredients.
Mini Muffin Variations to Try
Once you’ve mastered the base recipe, the fun really begins. There are dozens of mini muffin recipes you can try by switching up flavors, mix-ins, and textures. Whether you want something fruity, hearty, or lightly spiced, mini muffins give you endless options.

Blueberry Oat Mini Muffins
Swap the chocolate chips for blueberries and add a bit more oat flour. A touch of lemon zest makes them bright and fresh. Perfect with a morning coffee or tea.
Banana Nut Mini Muffins
Use mashed banana as the main sweetener and mix in chopped walnuts. Add a sprinkle of cinnamon for extra warmth. These are great for meal prep and freeze beautifully.
Apple Cinnamon Mini Muffins
Grate a fresh apple and combine it with cinnamon, nutmeg, and a little brown sugar. They’re moist, naturally sweet, and kid-friendly.
Pumpkin Spice Mini Muffins
Add pumpkin puree, cinnamon, and cloves to the base batter. A fall favorite that also works year-round when you want something cozy and soft.
Double Chocolate Mini Muffins
Use cocoa powder in the batter and toss in both chocolate chips and chunks. Great for dessert or satisfying a chocolate craving without overindulging.
You can even go savory. Try adding shredded cheese, spinach, and herbs for a savory breakfast version. Just make sure to adjust the sugar and remove sweet elements like vanilla.
The best part about making mini muffins is how easy it is to mix and match ingredients. Use what you have on hand and build flavor combinations that work for your taste.
How Long to Bake Mini Muffins
Getting the mini muffin cook time just right is key to achieving that perfect texture. Too short and they’re undercooked in the center. Too long and they dry out fast. The good news? Mini muffins bake up much quicker than regular-sized ones.
Standard Bake Time
Most mini muffin recipes call for baking at 350°F for 10 to 14 minutes. Depending on your oven and the ingredients you’re using, you might need to adjust by a minute or two. Oat-based or fruit-filled batters sometimes take a bit longer.
To test for doneness, insert a toothpick in the center of one muffin. If it comes out clean or with just a few crumbs, you’re good to go.
Tips for Better Baking
- Use an oven thermometer to ensure your oven is at the correct temperature.
- Rotate your pan halfway through baking for even browning.
- Avoid overfilling the cups. Stick to about two-thirds full so they don’t spill over.
- If baking multiple trays, try one batch first to fine-tune the exact mini muffin cook time.
Baking for Texture
If you want softer muffins, pull them out as soon as the tops spring back when lightly touched. For a slightly crisp edge, leave them in for a minute longer. It’s all about preference.
Whether you’re baking chocolate chip mini muffins, fruity banana blends, or a Little Bites muffins recipe copycat, this timing method works like a charm.
Storage and Freezing Tips
One of the best things about mini muffins is how well they store. Whether you’re baking ahead for the week or making extra for future snacking, these little bites hold up great with the right storage methods.

Short-Term Storage
If you plan to eat your mini muffins within a few days, store them in an airtight container at room temperature. Place a paper towel under and over the muffins to absorb excess moisture and keep them from becoming soggy.
They’ll stay fresh for about 3 to 4 days this way. You can also store them in the fridge, but that may slightly dry out the texture unless they’re warmed up before serving.
Freezing for Later
To freeze, allow the muffins to cool completely, then place them in a single layer on a baking sheet and pop them in the freezer for 1 to 2 hours. Once frozen solid, transfer them to a freezer-safe bag or container. Label with the date so you remember when they were made.
Frozen mini muffins can last up to 3 months. When you’re ready to enjoy them, let them thaw at room temperature for about 30 minutes or reheat in the microwave for 10 to 15 seconds.
Best Practices
- Freeze different flavors in separate bags to avoid mixing aromas.
- Don’t freeze muffins with glazes or soft fruit toppings, as these don’t hold up as well.
- For school lunches, place a frozen muffin in the lunchbox and let it thaw by snack time.
Whether you made a batch of chocolate chip mini muffins or a healthier oat-based option, these storage tips help you keep your treats fresh and ready.
Mini Muffin Toppings and Mix-ins
One of the easiest ways to customize your mini muffins is by switching up the toppings and mix-ins. This small change can turn a basic batch into something exciting and bakery-worthy.
Sweet Add-ins
- Chocolate chips – a must for classic chocolate chip mini muffins
- Blueberries – fresh or frozen, they add brightness and a juicy bite
- Banana chunks – add moisture and a natural sweetness
- Dried fruit – raisins, cranberries, or chopped dates bring chewy texture
- Cinnamon or nutmeg – a small pinch goes a long way in boosting flavor
Savory Twists
Mini muffins don’t have to be sweet. Try these savory mix-ins for a unique snack or breakfast option:
- Shredded cheese – cheddar or parmesan are great choices
- Chopped spinach or kale – for a healthy, veggie-packed bite
- Cooked bacon or turkey bits – adds protein and saltiness
Creative Toppings
Want to give your mini muffins a little flair? Add toppings before baking.
- Sprinkle rolled oats or crushed nuts for crunch
- A pinch of brown sugar or coconut sugar adds caramel-like sweetness on top
- Tiny chocolate pieces or fruit slices make them visually appealing
When using mix-ins, try not to go overboard. For mini muffin recipes, a general rule is about ½ to ¾ cup of mix-ins per batch. This keeps the texture light and fluffy without overwhelming the batter.
Whether you’re baking for breakfast, snacks, or dessert, thoughtful mix-ins turn basic mini muffins into flavorful, crave-worthy bites.
Healthy Oat-Based Mini Muffin Options
If you’re looking for a nutritious spin on your favorite mini-sized treats, oat-based muffins are where it’s at. They’re hearty, satisfying, and still soft and fluffy — perfect for breakfast, post-workout snacks, or lunchbox additions.
Why Use Oats?
Oats are rich in fiber and give your muffins a wholesome texture. They’re also more filling than regular flour, which makes them ideal for anyone trying to curb mid-morning cravings.
You can use either whole rolled oats, quick oats, or oat flour in your base. Oat flour helps keep the muffins tender, while whole oats bring in a chewy bite.
Recipe Idea: Banana Oat Mini Muffins
- 1 cup oat flour
- ½ cup mashed banana
- 1 egg
- ¼ cup honey or maple syrup
- ¼ cup Greek yogurt
- ½ teaspoon cinnamon
- ½ teaspoon baking powder
- Optional: chopped walnuts or chocolate chips
Bake at 350°F for 12 to 14 minutes, until golden and springy. These are naturally sweet, freezer-friendly, and packed with nutrients.
More Healthy Variations
- Apple cinnamon with grated apple and a touch of maple
- Blueberry oat muffins with lemon zest for brightness
- Carrot cake mini muffins using shredded carrots and raisins
- Pumpkin spice with oat flour and almond milk
These versions prove that nutritious doesn’t mean boring. You can enjoy the goodness of whole grains without missing out on flavor or texture. Plus, they’re easy to customize for dietary needs like gluten-free or dairy-free diets.
Mistakes to Avoid When Baking Mini Muffins
Even the simplest mini muffin recipes can go sideways if you miss a few important steps. Here’s how to avoid the most common baking mistakes so your muffins come out soft, fluffy, and flavorful every time.
1. Overmixing the Batter
Stirring too much activates the gluten in the flour. This leads to dense and chewy muffins. Mix only until the wet and dry ingredients are just combined. A few lumps are perfectly fine.
2. Overfilling the Cups
Fill each mini muffin cup about two-thirds full. Going too high can cause overflow and uneven baking. This is especially important when using chocolate chips or fruit.
3. Not Greasing Properly
Even if you have a non-stick pan, it helps to use cooking spray or paper liners. Mini muffins are delicate and can break apart if they stick to the pan.
4. Using Cold Ingredients
Cold eggs or milk can mess with your batter. Let everything come to room temperature before mixing to keep the texture smooth.
5. Baking Too Long
These little muffins cook quickly. Always start checking at the 10-minute mark. A toothpick should come out clean or with just a crumb or two.
6. Skipping the Cooling Step
Let the muffins rest for a few minutes before taking them out of the pan. This helps them hold their shape. Waiting too long can cause soggy bottoms from trapped steam.
7. Not Measuring Properly
Too much flour or not enough liquid will mess with the final texture. Use proper measuring tools for both dry and wet ingredients to keep the recipe balanced.
Avoiding these simple errors makes all the difference whether you’re baking chocolate chip mini muffins, banana oat blends, or a homemade Little Bites muffins recipe.
FAQs About Mini Muffins
How long do mini muffins take to bake?
Most mini muffins take between 10 to 14 minutes at 350°F. Always check with a toothpick — if it comes out clean, they’re ready.
Can I freeze mini muffins?
Yes. Let them cool completely, then freeze in a sealed container or freezer-safe bag. They last up to three months and thaw quickly at room temperature.
What’s the difference between mini muffins and regular muffins?
Mini muffins are smaller, bake faster, and are often used for snacks or portion-controlled treats. The recipe is usually the same, just adjusted for size and mini muffin cook time.
Can I make mini muffins healthy?
Absolutely. Try oat flour, reduce sugar, and use mashed banana or applesauce instead of oil. These changes create a more nutritious version without sacrificing flavor.
Why are my mini muffins dry?
Overbaking is the most common reason. Also, too much flour or not enough fat can dry them out. Stick to tested mini muffin recipes and measure carefully.
What pan should I use for mini muffins?
Use a mini muffin pan with 24 cups. Standard pans won’t give the same size or cooking time. Silicone or non-stick pans work best for easy release.
How do I prevent soggy bottoms?
Don’t let muffins sit too long in the hot pan. Cool them on a wire rack after 5 minutes. Also, avoid adding too much fruit or wet ingredients.
Can I add toppings to mini muffins?
Yes. Mini chocolate chips, oats, crushed nuts, or cinnamon sugar are great topping ideas. Just sprinkle them before baking.
Final Thoughts, Internal Links, and Amazon Picks
Mini muffins prove that great things really do come in small packages. Whether you’re baking chocolate chip, banana oat, or experimenting with healthy oat-based versions, these bite-sized treats are the perfect balance of fun, flavor, and convenience.
With a little prep and a good base recipe, you can make mini muffins for every occasion — from weekday breakfasts to party platters and after-school snacks. The best part? They’re quick to bake, easy to store, and endlessly customizable.
Internal Links You Might Enjoy
Explore more baking inspiration and smart snack ideas on GrowVibe:
- 🔗 Baby Shower Food Ideas – Includes mini muffin-style treats and party-friendly snacks.
- 🔗 5-Minute Sweet and Sour Sauce Recipe – A tasty dip to pair with savory mini muffins.
Amazon Picks for Easy Muffin Baking
🧁 GoodCook Non-Stick 24-Cup Mini Muffin Pan
Sturdy steel construction with a quality non-stick surface — ideal for even baking and effortless cleanup.
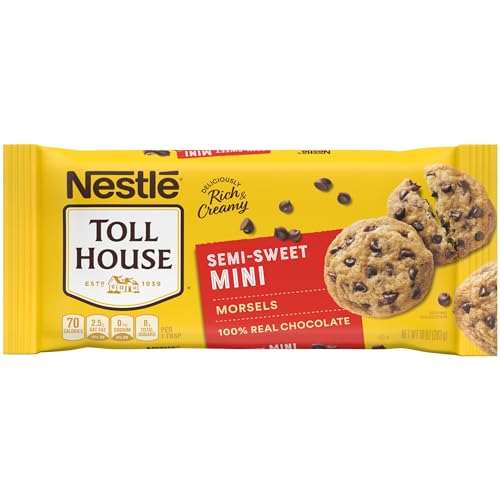
🍫 Nestlé Toll House Semi-Sweet Mini Chocolate Chips
Perfect size and melt factor for folding into your favorite chocolate chip mini muffin recipe.
🥣 CAKETIME Silicone Mini Muffin Pan (24-Cup)
Flexible silicone with reinforced edges makes removing muffins super easy no liners needed.